


As a follow-up to my post on fun fall foods (read it here), I am back to share a couple of fun fall crafts you can knock out just in time for Halloween. I know you are all done with everyone’s costume, the house is perfectly decorated, the candy has been bought (you haven’t even broke into yet) and you are just sitting around looking for things to do so here you go. You’re welcome.
Now, just like with cooking, I have some ground rules for crafting:
- I am a perfectionist. I also happen to SUCK at doing anything artsy. This is an unfortunate combination when it comes to crafting so any project I pick has to be EASY.
- As follow up to #1, no drawing allowed. Cutting, gluing, glitter welcome but absolutely no free-hand sketching of any kind.
- What I lack in skill I make up for by over-buying supplies. If it doesn’t require a trip to Hobby Lobby or Michael’s, I don’t want to do it.
- Bonus points are awarded if the project includes my kids’ handprints or footprints. Yes, it’s a pain to execute this but it melts my heart every time.
- I like attention. Dear readers, I know this comes as a shock to you #saidnooneever. At any rate, I love a good craft/treat that can be easily mass produced and handed out to teachers, friends, co-workers and strangers on the street in the hopes of receiving a “you’re so creative!” or a “who are you and why are you giving me this?”
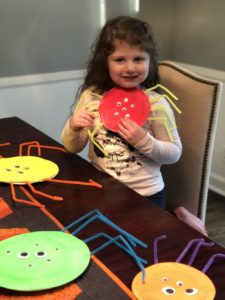
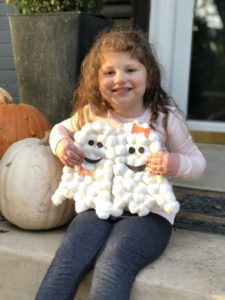
First up are these cute paper plate spiders and puffy friendly ghosts. These are easy enough that even the littlest of goblins can do them and you probably have all the stuff you need right at home (ugh – rule #3 broken but I will make an exception because these are cute and easy).
For the spiders, you need:
- Paper plates
- Pipe cleaners
- Googly eyes
- Glue
- Tape
- Stapler
- Paint, crayons, markers (if you’re feeling ambitious)
- Hole-punch
- String
Directions:
- Flip the plates upside down
- Color the paper plate as you see fit (or buy colored paper plates and skip this step)
- Glue googly eyes in the middle of the plate (or wherever you feel like it)
- Bend pipe cleaners in half and attach four on each side of the plate with tape to make the legs
- Attach the plates by stapling around the edge
- Punch a hole in the top of the plate and thread a string through so that you can hang your cute little creepy crawly friend
I think it would be adorably spooky to have a bunch of these hanging in a window or on the front door.
For the ghosts, you need:
- White card stock
- Cotton balls
- Glue
- Black construction paper
- Scissors
Directions:
- Draw a ghost shape on the white card stock. Yes, I just broke another one of my rules above but even I can draw a pretty good ghost.
- Cut out the ghost
- Fill in your ghost with cotton balls (may want to take this step into consideration when deciding how big to make your ghost)
- Cut out eyes and a mouth from the black construction paper and glue onto the fluffy ghost
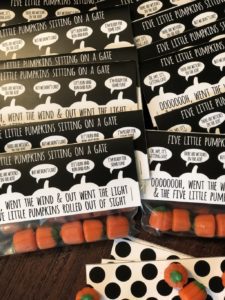
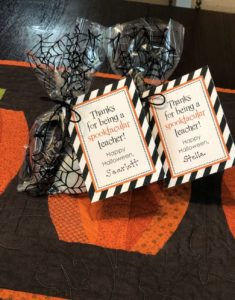
Being able to utilize other people’s real crafting skills with free printables is totally my jam. They do the work but I get the credit and so can you! I love using gift tags attached to snack sized plastic bags at every season.
They are perfect for an inexpensive class favor because it doesn’t take a lot to fill them! I went ahead and filled these with pumpkin candies but you could totally do non-food items like pumpkin stickers, erasers or bouncy balls.
For the favor bags you need:
- Card stock
- Cute printable gift tag (get the one I used here)
- Snack size plastic bag
- Candy or small toys/favors
- Stapler
- Scissors
Directions:
- Print off the gift tags on your card stock. You can do it at home or you can be like me and take it to FedEx and let them do it for you.
- Cut out the tags (FedEx will do this for you too for a very nominal fee)
- Fill the plastic bags with your treats
- Fold the gift tag in half and attach it to the top of the plastic bag with a staple in each corner
- Prepare to be fawned over when you hand these out
Once a brown-noser, always a brown-noser, so of course I will be giving a little something something to my kiddos’ teachers for Halloween. While I would love to make it rain gift cards on each and every one of them that is not feasible in my discretionary budget. Instead, I put together these cute little s’mores kits using to show them our love.
For the s’mores kits you need:
- Small plastic treat bags
- Graham crackers
- Snack-sized Hershey’s bars
- Jumbo marshmallows or Halloween-themed Peeps (such as these)
- Printable gift tag (get the one I used here)
- Card stock
- Scissors
- Hole punch
- String
Directions:
- Prep your gift tags (see steps #1 and #2 above)
- Break one sheet of graham cracker into 2 pieces and place it in the bag with two candy bars and one marshmallow or Peep
- Punch a hole in your gift tag then tie the bag shut and secure gift tag to the bag with string
- Prepare to have your child be the favorite at school
Now, open up some wine, break into that candy you bought for trick-or-treaters and get to crafting! If you’re feeling especially festive, share your favorite Halloween craft project or gift idea below.


