


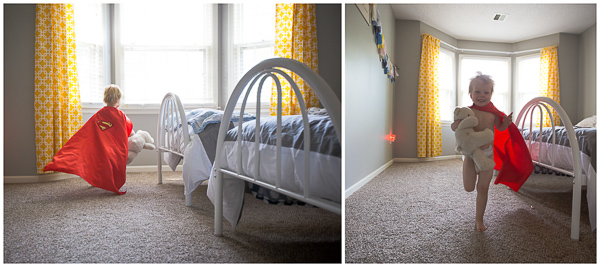
There’s nothing like grabbing your camera to capture your little one’s darling food-covered face only to realize it’s totally dark once you actually take the picture. Or wanting to snap their awesome underwear and superman cape run through the house only to realize it’s completely blurry.
I would have been so sad to miss this moment!
Like all aspiring photographers or documenters of the everyday, I’ve been there – and have been completely frustrated and disappointed. Over time, however, I grew to understand that many times it’s not the camera that’s the problem, but learning how to manipulate the camera is the secret behind the beautiful shots. The following are the first four basic tips to start on this journey.
1.Start taking over your camera.
Most of the time, fancy camera settings end up being kept on the “green box.” This means that you are shooting in “auto” and allowing the camera to automatically do all the thinking for you. Many times, your pictures will end up just fine. However, throw in any tricky situations such as taking a picture facing into the sun, with a really bright background (called “backlit” situations), or in really dim light and you will find that your image won’t look how you want it to look. Reading your camera manual and switching to “aperture priority” (AV on the same dial as the “green box”) mode will allow you to start doing some of the thinking when you take the picture. Eventually, shooting in all manual (controlling all of the elements) will allow you to create the perfect image.
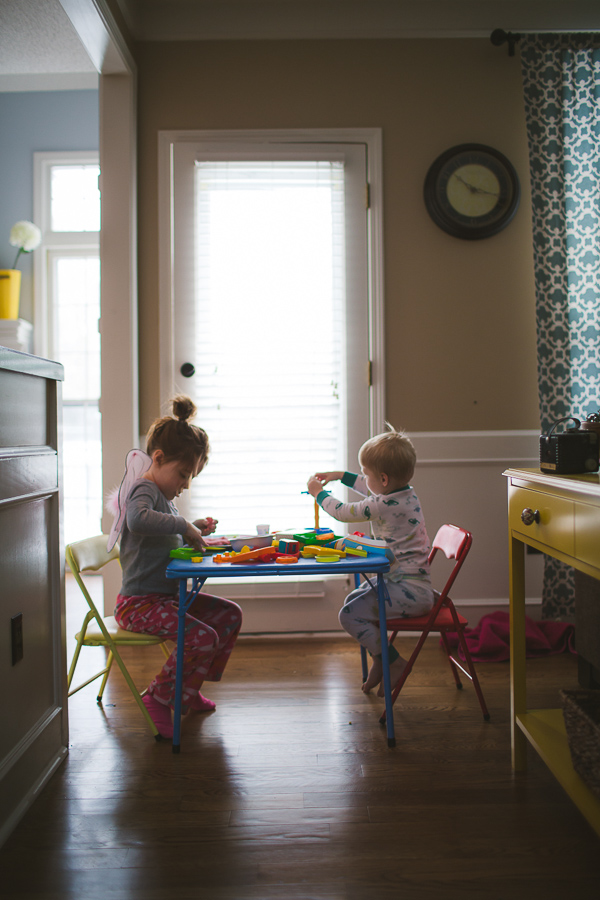
If I hadn’t shot this in manual (controlling all of the settings), the camera would have read the light behind my children as being too bright and the resulting image would have been too dark. By “taking over my camera”, I chose the settings that would allow the image to still show their faces and vibrant colors of their toys.
2. Understand Exposure.
Exposure is the amount of light you let into the camera and determines how light or dark an image is. When you expose perfectly, there are no areas too dark and no areas too light; there are no details lost in the image. When you look through your viewfinder, you will see your “meter” at the bottom. When you point your camera around the room or around different lighting situations, you will see the “ticker” move at the bottom of the viewfinder. The zero in the middle is technically “perfectly” exposed. The camera is taking all of the light in the situation into consideration as well as the settings it is currently set at and giving you a “reading” of how the image would be exposed. When you shoot in manual, you can adjust different settings to make sure the image is perfectly exposed. If you are shooting in “aperture priority” (the AV on the main dial), you can adjust the metering on the camera to make sure it is reading the light correctly.
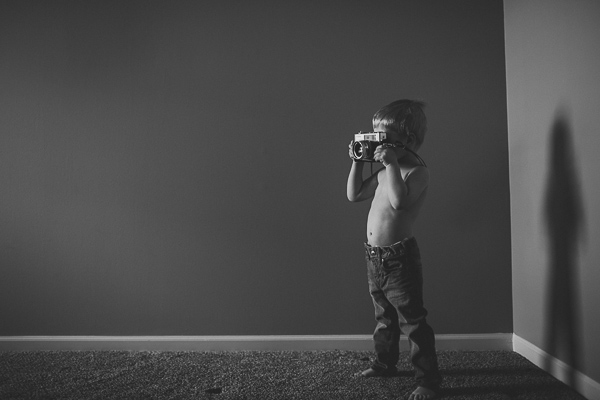 This image borders on underexposed (too dark), but I loved the ways the shadows fell and the window he faced lit him softly.
You can see more example images and explanations here.
3. Understand Aperture, Shutter Speed and ISO.
There are three main elements to shooting an image the way you want it to look. Controlling and adjusting these three settings are how you determine the exposure (how light or dark you want the image).
Aperture: Have you ever noticed how photographers can make the background of their image blurry? This is what draws your focus to a particular part of a photo and/or gives a very artistic feel to the image. This is controlled by aperture. The aperture is an opening in the lens that you can adjust to let more or less light in. By setting the aperture to the smallest number, you let the maximum amount of light in and your background will be the blurriest. The greater the f-stop (another word for aperture), the less amount of light will be let in and the crisper the entire image will be.
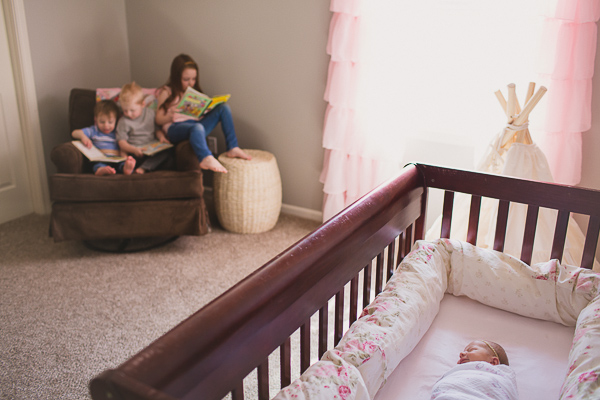
I wanted my newborn, Lucy, to be the only one in focus with her older siblings in the background so I set my f-stop/aperture at f/1.8 for this shot.
Another resource to understand aperture can be found here.
Shutter Speed: Controlling your shutter speed can greatly improve the quality of your photos. When you allow your camera to choose the shutter speed, it will often choose a slower shutter speed to let more light in. However, the camera may not know that you are trying to photograph a toddler who doesn’t know the meaning of “hold on, let me take your picture!” 🙂 The shutter speed is measured in seconds (or fractions of a second) and is how quickly the camera opens and closes to let light in to expose the image.
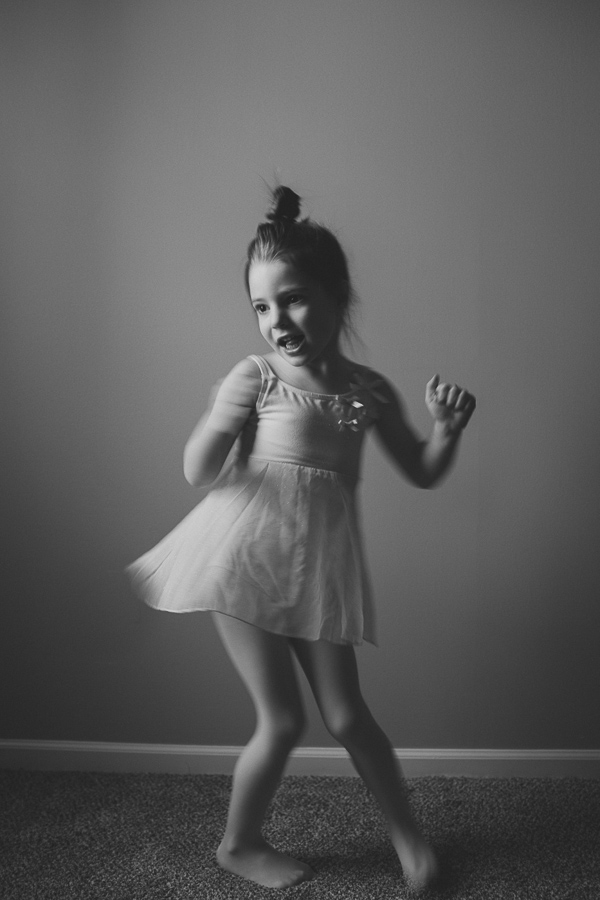
I chose a slow shutter speed (1/60 of a second) for this shot to show the movement in my daughter’s spin.
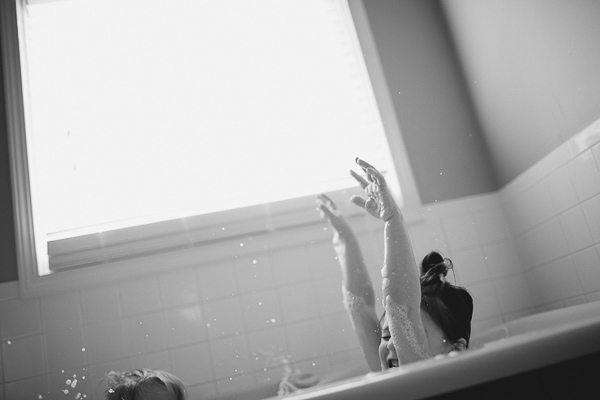
A fast shutter speed (1/500 of a second) caught the tub splashing just perfectly!
ISO: This setting on your camera is what determines your camera’s sensitivity to light. The higher quality camera, the better the ISO capability. If you are getting used to shooting in manual, it might be easiest to leave your ISO set to auto as you get used to using aperture and shutter speed together and then add controlling ISO to the mix once you are comfortable with the other settings. The higher the number the ISO is set at, the more sensitive your camera will be to light and the more light will be let in. However, the higher the number, the more “grainy” your image will be. This is unavoidable in dark situations and is a better choice than a blurry image (by setting your shutter speed to a lower speed in order to let more light in) but it’s something to consider if you plan on printing the picture.
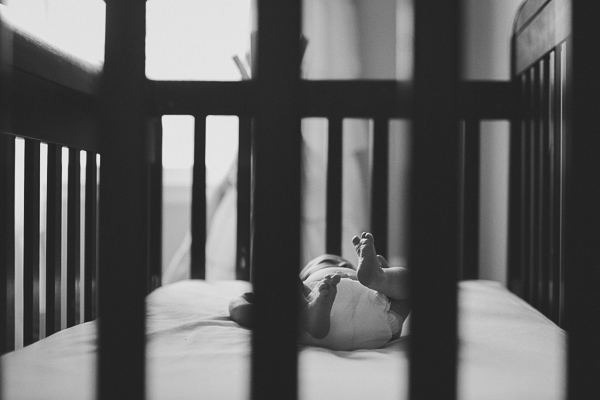
Because this image was taken on a dark day and inside, I had to set my ISO at a really high number to bring enough light into the image. The downside to this is that images can appear more “grainy”, but it is worth it to be able to then use a faster shutter speed.
To see examples of using different ISO settings, see this link:
http://clickitupanotch.com/2010/10/iso-basics/
More information on the Exposure “Triangle”:
http://clickitupanotch.com/2010/09/shooting-in-manual-the-basics/
4. Study your images to improve.
Yes, this can all be very confusing in the beginning. The terminology seems complex and knowing how to resolve what you WANT your photo to look like and how it ACTUALLY looks can be very frustrating. Many times people resort to thinking that they just don’t have a nice enough camera. However, just like everything else in life, practice makes perfect. Study the images you take and review the settings that you use. Research answers for why your photos might still be blurry or not appear the way you want them to.
http://clickitupanotch.com/2011/02/how-to-take-a-sharp-photo/
Asking yourself to consider why you used the settings you did will help you become a more thoughtful and intentional photographer – a documenter of the everyday.

Three of my four reasons for learning my camera.


Hey Allison,
Such and awesome post and I LOVE all the images. Thank you for including some links to my site as well. I’m honored 🙂